Showing posts with label tutorial. Show all posts

Wednesday, June 18, 2008

Life and Death of Peanut Men

I’ve always been crafty.

Mom is always amazed when she sees bored children since we were always investigating _something_. Jamie and I made quite excellent volcanoes in the sandbox with the garden hose (Mom built the sandbox! It’s genetic!) and Tom pretty consistently took every mechanical thing we own apart to see how it worked. I once tasted every flower in the backyard except for the dreaded deadly nightshade. Begonias are sweet and juicy. Tulips taste bitter and waxy, which is fortunate because they’re poisonous.

I also invented a weird gel by mixing white glue, washing powder, and spray starch. This had a strange gummy consistency but only stuck to itself. Very peculiar, but I recreated it several times. I believe it may have been a colloid.

I had a couple of craft books for kids (I was born in 1980, but most of the toys we played with were late 1970s) that featured kids in groovy outfits building exciting things. I can still feel the longing to create a life sized alligator out of paper mache and chicken wire, just like in the photos. They did have some smaller scale projects including peanut men.

Peanut men, or ladies, take advantage of the usual bi-legume peanut shell shape. To make, draw a little face on the upper half of the peanut shell. Add eyelashes or curly hair lines if the peanut exudes a feminine mystique. Stick a toothpick through the join of the two nuts for arms. Cut another toothpick in half and stick the two halves into the bottom shell for legs. Then find two single nut peanuts and stick them onto the leg picks. If you balance correctly (always a tricky situation for the under 10s) they’ll stand up.

I made a whole set of these on a hot summer afternoon and left them on a paper plate near the TV in the kitchen for the family to admire. The flaw here is that these people are made of delicious salted in the shell roast peanuts.

When I got up the next morning, disaster! Peanut shells and toothpick legs were spread with wild abandon. Salty carnage, the peanut men had been savaged by hungry dads during the night.

Tuesday, May 20, 2008

Top Secret Activities— REVEALED!! Part 1

The big secret over here at the blog was the preparations for Eli’s birthday party!

We had two big secrets.

Iron Maiden Eddie Cupcakes

These chocolate blue frosted cupcakes are topped with jaunty little picks each featuring a different picture of Eddie from Iron Maiden album covers. Eli is a huge Iron Maiden fan and he loved these.

I can’t believe I found 24 different Eddie photos without having to use fan art.

I used Google Image Search to find Eddie pics and then I cropped them down so they just

 featured Eddie’s face.

Using Photoshop, I put the images onto a letter sized file. I was able to fit 12 Eddies to a sheet.

I then printed them onto to printer friendly Shrinky Dink plastic, cut them out, and shrunk them in the oven. The printer plastic is opaque, so they had a finished Eddie side and a plain white side.

I sealed the little images (Apparently nail varnish is the thing. They even recommend certain brands!) and superglued the backs to little plastic toothpicks. I added a little pirate sticker to the back for extra support (pirates being the most metal stickers I could find).

The images translated remarkably well! Especially the Killers album and the Wicker Man.

I’m glad I read the instructions, because you have to lighten the images by at least 50% (which is easy on Photoshop. You just use the brightness/contrast levels). Some of them were a little dark even so. They also have only one side that is printable and you tell by licking your finger and seeing to which side it sticks (very scientific).

I gave them to Lauren ahead of time and she couldn’t resist showing them to Eli early. He was able to name the album each Eddie was from, including live and exports! I know he’s a member of the Iron Maiden fan club, but he probably ought to be the president. They went very well with his Iron Maiden themed birthday cake.

Pictures from the big event are soon to follow.

Wednesday, April 23, 2008

This Must Be Underwater Color

I always loved art class in school. I loved clay, acrylics, pastels, colored pencils, figure drawing, etc, etc, and I was pretty good at most of them. But the most deceptively simple and difficult of all, I believe, is the watercolor.

You’d start out with the lightest possible pencil sketch and eventually end up with a muddy grayish page. “This doesn’t look like The Badlands!” you’d regally remark and toss your crumpled page in the bin.

In Norway, I began watching Cranshaw’s Watercolor Tours, which featured a gnomish English gentleman who toured Europe and the Middle East making enthusiastic comments about hookah smokers and occasionally stopping for a quick watercolor. I learned two things:

  1. You need actual watercolor paper. It absorbs the color and holds it in place. I think my art teachers substituted drawing paper which quickly becomes a soggy wrinkled sheet. On the other hand, it’s probably much much cheaper for Middle School students who probably weren’t going to produce amazing works of art anyhow.
  2. The pencil sketch underneath is vital. It’s how you produce shading. You can do some with the paint itself, but that pencil shading will give you darker, better shadows and forms. I was always instructed to use the paint for all the shading and the sketch was simply a guideline.

Now, like most rules, I feel certain gifted painters can totally disregard them, but one must crawl before one rockets a small dog into space.

I also learned some good tips on combining color and adding washes from Cranshaw. We started watching him because Knut would get so relaxed he’d fall asleep in seconds. He’s as good as a bedtime story, and I mean that as a compliment.

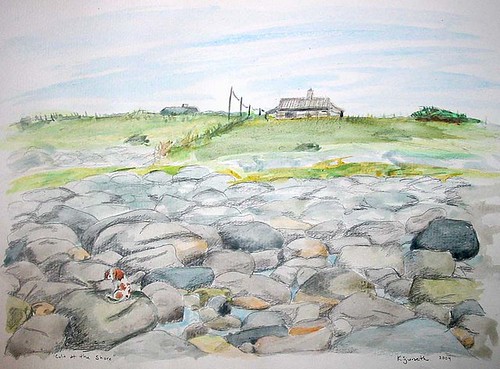
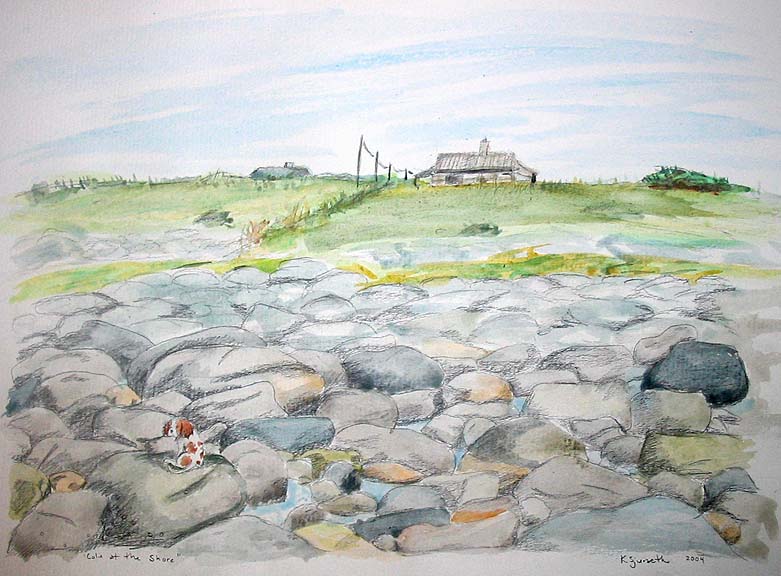
I haven’t done much painting since we moved back to the US (I am so tempted to make this Altoid box watercolor box so I can do guerrilla painting. Genius!), but I did enjoy it in Norway. This painting is of Colin on the shore of the North Sea. I gave it to my dad as a Christmas present. Here's the full version.

Thursday, April 3, 2008

The Amazing Shrinky Dink Ruler

I’m making a luchador necklace for Eli (with big manly links. It’ll be tough!), but I lost the original sketch of the masks. No problem, I could recreate those, but I couldn’t remember how big the shrinky dinks were before I shrunk them in the oven. So I got out a ruler and applied my mathematic skills.

It turns out I have no mathematic skills.

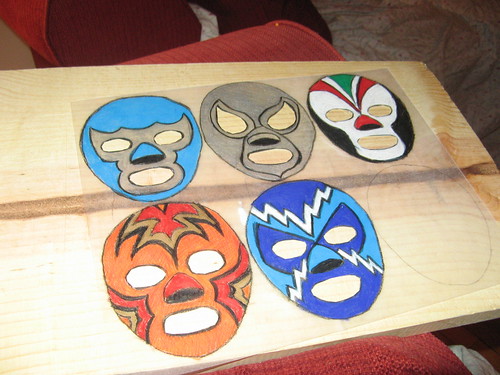
I now have five beautiful 3 inch long luchador masks. Okay, they will make very nice fridge magnets (although I think they should be backed with another layer of plastic for stability), but they're way too large for a necklace.

Clearly I needed some kind of tool.

I made one.

Now I don’t claim to be the only one to have thought of this, but it was an original idea for me. After all, bats and birds both developed flying abilities wholly separate from one another.

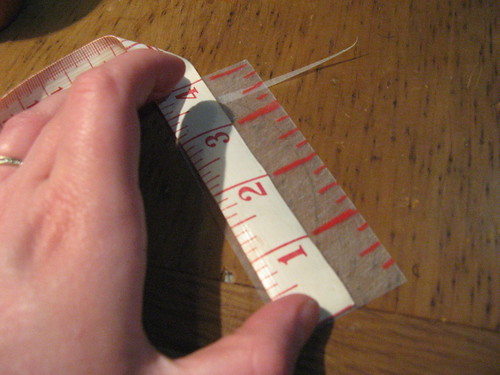
I took a scrap piece of Shrinkydink and laid a measuring tape next to it.

I then marked off all of the measurements on the plastic.

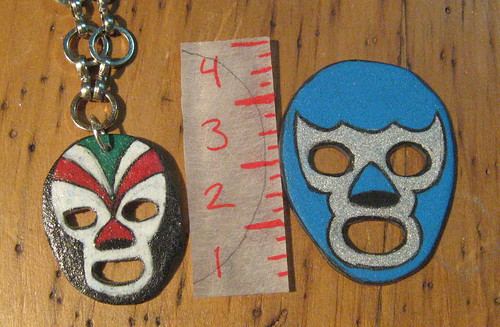
Then I baked it in the oven, shrinking it down. All shrinky dinks of the same brand should shrink to the same proportion.

Now I can tell how big a shrinkydink was before I baked it!